• Skip to primary navigation
  • Skip to main content
  • Skip to primary sidebar
  • Skip to footer
  • Family Games
  • Family Game Night Ideas
  • Toy Making
  • Videos
  • Activities
  • Educational Activities
  • Crafts for Kids
  • Toddler Art Activities
  • Toddler Motor Skills Activities
  • Preschooler Art Activities
  • Winter activities for kids
  • Cooking Activities for Kids
  • Traveling With Kids
  • Christmas Crafts
  • Happier Parenting
  • Mommy Time
  • Motherhood Tips
  • Acts of Kindness Ideas
  • Kid Friendly Recipes
  • Things We Love
  • Easy Halloween Costume for Kids
  • About/Contact

PLAYTIVITIES logo

menu icon
go to homepage
subscribe
search icon
Homepage link
  • Family Games
  • Family Game Night Ideas
  • Toy Making
  • Videos
  • Activities
  • Educational Activities
  • Crafts for Kids
  • Toddler Art Activities
  • Toddler Motor Skills Activities
  • Preschooler Art Activities
  • Winter activities for kids
  • Cooking Activities for Kids
  • Traveling With Kids
  • Christmas Crafts
  • Happier Parenting
  • Mommy Time
  • Motherhood Tips
  • Acts of Kindness Ideas
  • Kid Friendly Recipes
  • Things We Love
  • Easy Halloween Costume for Kids
  • About/Contact
×

Home » Activities » Make Toy for Baby. Round 3

Published: Aug 1, 2014 · Modified: Oct 31, 2021 by Birute Efe · This post may contain affiliate links · Leave a Comment

Make Toy for Baby. Round 3


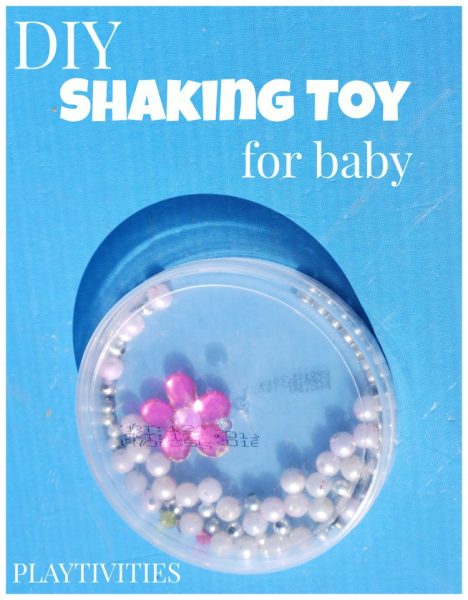
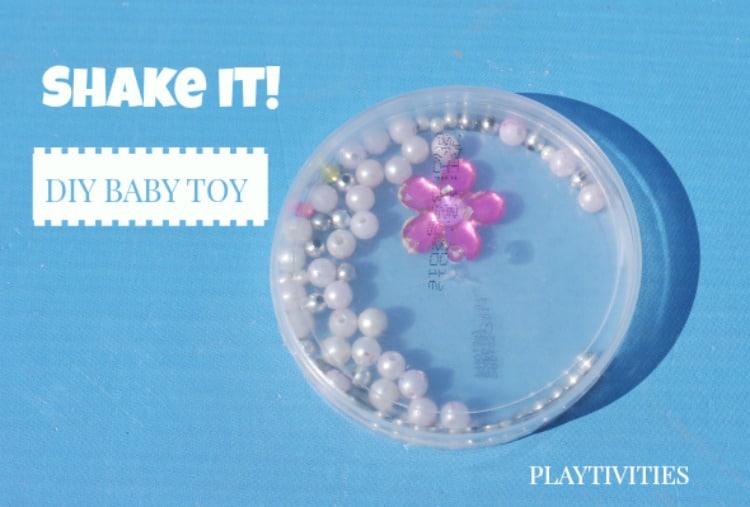
It will take you literally 2 minutes (at most) to make toy for baby. This is my 3rd post on Homemade Baby Toys series post. I listed the other two in the bottom of the post.

homemade baby toy

Things you will need:

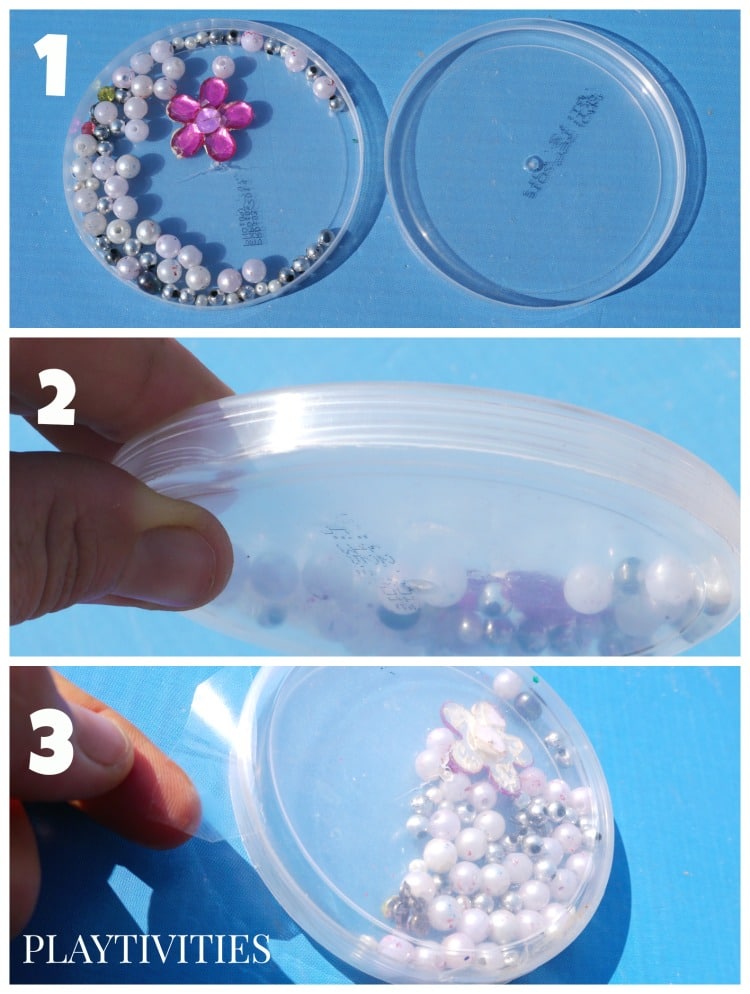
  • 2 clear plastic lids (like from bigger yogurt container)
  • beads or anything else you would want to put inside the toy (pasta, grains)
  • glue or hot  glue gun
  • tape

 Instructions on how to make toy for baby

baby toy1

It's really self explanatory, but here are the things that I did:

1. Put the beads (or whatever you are putting) in one for the lids.

2. Put the glue around of the lid's edges and put it into the other lid. It might take some squeezing and pushing, but you should be able to fit one lid into another one.

3. Wait until the glue is dry and put the tape all around. I think this is optional, just for extra piece in mind.

homemade baby toy

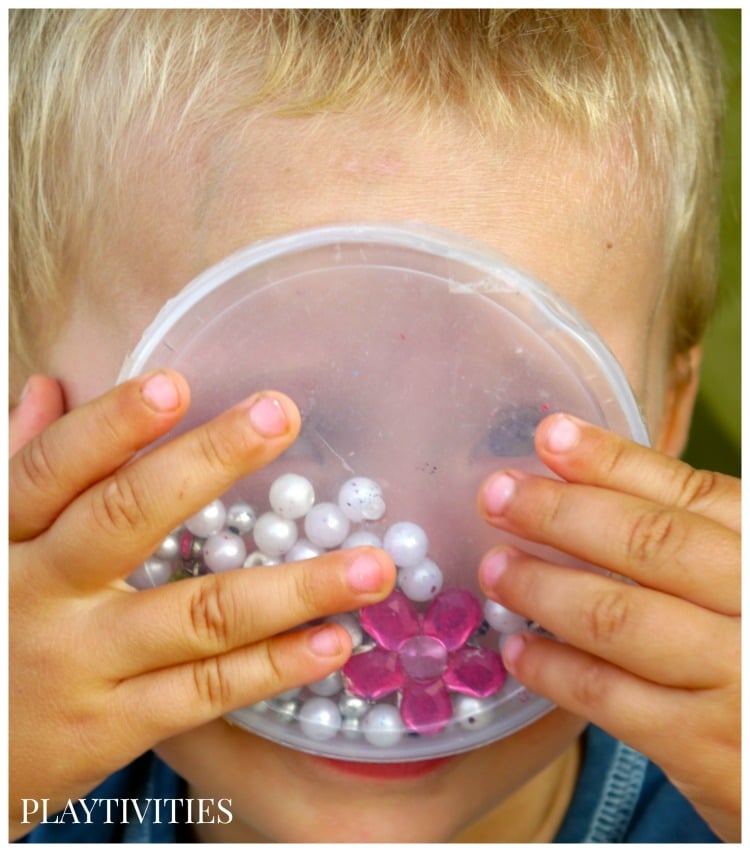
Even my toddler son had fun with it. He was trying to see it through the clear plastic lid. Earlier I caught him just rolling the beads from one side to another. It was a nice calming toy for him.

make baby toy3

Make baby toys like this one as gifts, thank you treats at birthday parties with personalized message in them (on them).

shaking baby toy

Here are the other two Homemade baby toys. (press on the picture to get to the post)

                         homemade baby toy                     toy for baby

IMPORTANT. This is a DIY toy. Nothing tested or inspected of course. Make your own judgments on whether it's safe for your child to play with it. And if you do, please don't leave your child unattended. There is tape that can get scratched off and could get into baby's mouth. or the toy can be stepped on by an adult and the beads could become loose.

For some more DIY Toys please check out my Toy Making Category or my DIY TOYS FOR KIDS Ebook.


« Recycled DIY Toy For Baby
Photography Tips For Kids »

Reader Interactions

Leave a Reply Cancel reply

Your email address will not be published. Required fields are marked *

Primary Sidebar

Footer

  • About us
  • Advertise
  • Have a question?
  • Privacy Policy
  • Terms & Conditions
  • Disclaimer

Copyright © 2022

74 shares
  • 1