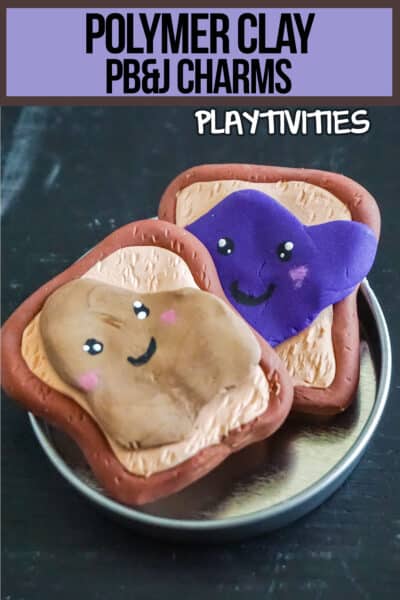


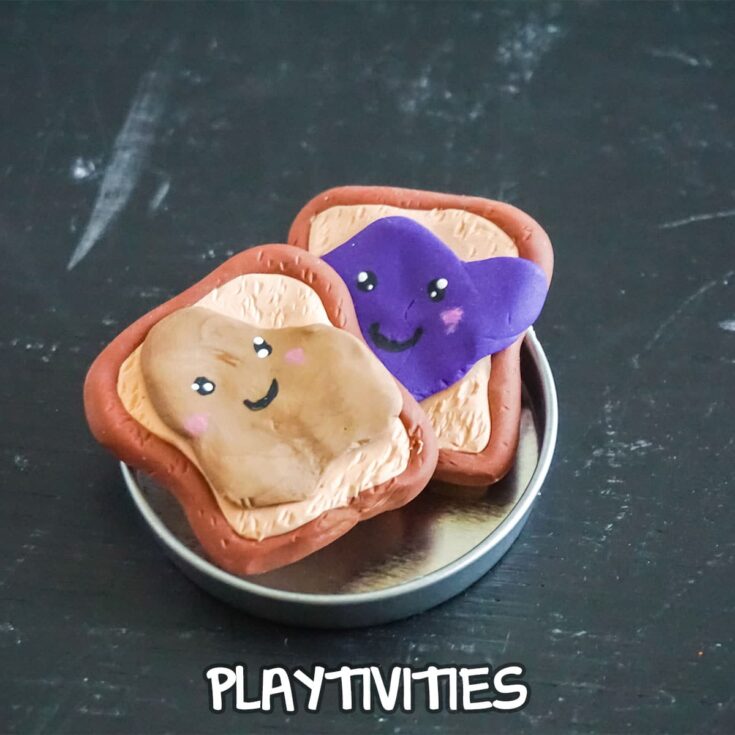
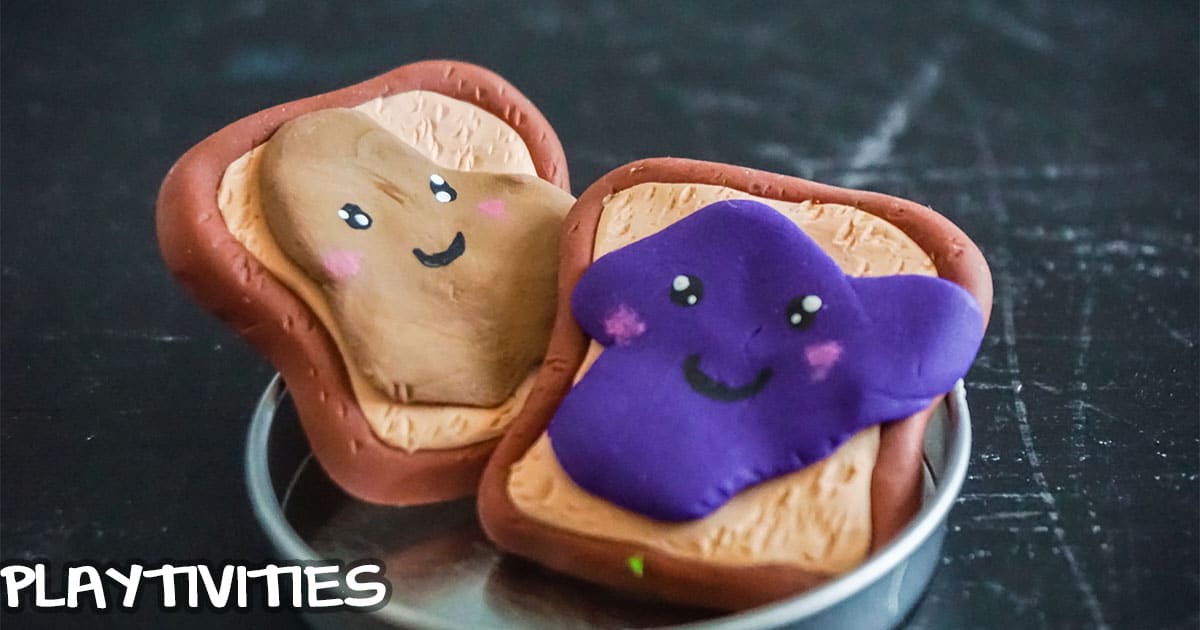
Who doesn't love peanut butter and jelly sandwiches?! If you have a best friend, you definitely have called them the PB to your J or vice versa. In this tutorial, we will show you how to make adorable polymer clay PB&J best friends charms!
These little guys are perfect for a charm bracelet or necklace, or even as keychains! They are so easy to make and require very few supplies, so let's get started!

How to Make PB&J Best Friends Charms from Polymer Clay
What Are Best Friends Charms?
Best friends charms are little tokens of friendship that you can give to your best friend (or BFF, as we like to call them). They can be anything from a simple piece of jewelry to a keychain or even a charm for your phone. Whatever they are, they should be something that reminds you of your special bond with your bestie!
Why Polymer Clay?
Polymer clay is a great material for best friends charms because it is so versatile. You can mold it into any shape you want, and the sky is the limit when it comes to colors and designs. Plus, once you bake the clay, it becomes very strong and durable, so your charm will be able to withstand whatever life throws at it!
If you were thinking about using air-dry clay, I don't recommend it. It's not nearly as strong or durable as polymer clay, and it's also more difficult to work with. Trust us, you don't want your best friend's charm breaking the first time they wear it!
What Is Polymer Clay?
Polymer clay is a type of modeling clay that is made from polymers. It is very versatile and can be molded into any shape you want. Once it is baked, it becomes very strong and durable. Polymer clay comes in many different colors and can be found at most craft stores.
How Do You Turn These Polymer Clay Creations into Necklace or Bracelet Charms?
Before you bake your clay creations, you will need to add a jump ring to the top in order to turn them into charms. Once you have that inserted, bake as normal, then when it's cooled, thread your necklace or bracelet onto it. That's it!
What Supplies Do You Need to Make PB&J Best Friends Charms from Polymer Clay?
- Light Brown Polymer Clay
- Dark Brown Polymer Clay
- Tan Polymer Clay
- Purple Polymer Clay
- Rubbing Alcohol
- Pink Acrylic Paint
- Black Acrylic Paint
- White Acrylic Paint
What Tools Do You Need to Make PB&J Best Friends Charms from Polymer Clay?
- Oven
- Parchment Paper
- Baking Sheet
- Toothpick
- Paintbrush
- Butter Knife, optional
How Do You Make PB&J Best Friends Charms from Polymer Clay?
Preheat your oven to the temperature noted on your clay packaging. For my clay the baking temperature is 230-degrees F.
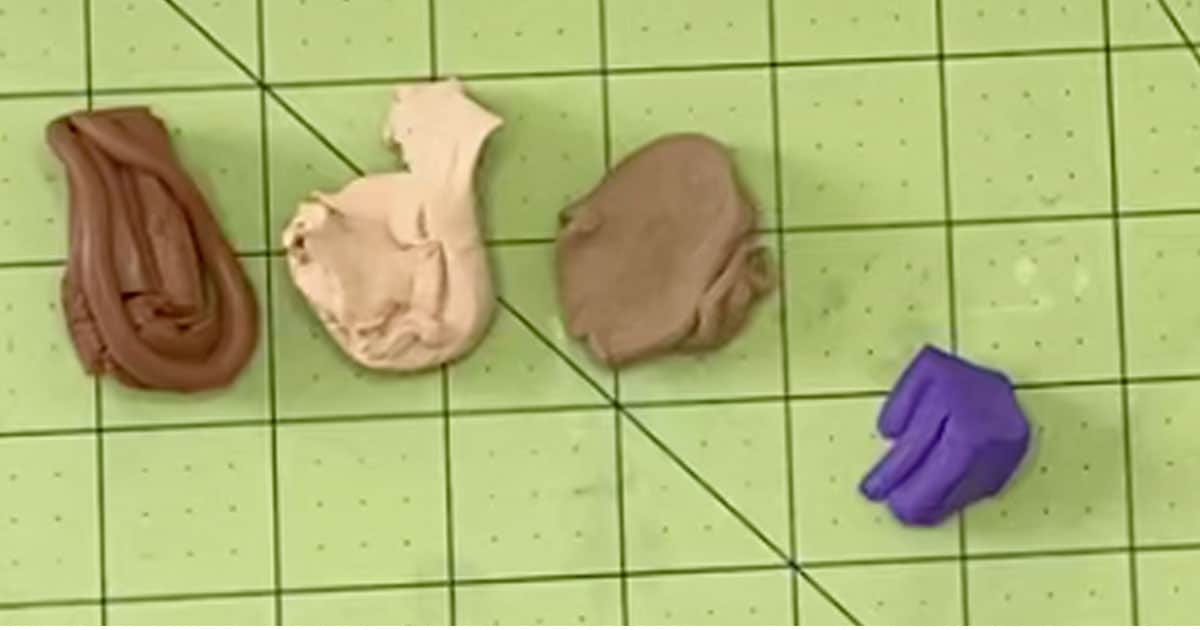
To make the crust of the bread/toast, break off a small portion (about 1/2 inch square) of the dark brown clay.
Roll this into a long, thin snake. Set aside.To make the main part of the toast, break off a small portion (about 1/4 inch square) of the light brown clay. Roll this beige clay into a nice, neat ball that is very smooth, then flatten it into a square of about 1/2 inch by 1/2 inch.
Pinch the square about 1/3 of the way down from the top (whichever end you'd like to be the top is up to you) and smooth the edges neatly. Repeat with a second piece to make a second piece of bread.
With the dark brown snake of clay, wrap the dark brown clay around the light brown clay square. Pinch off the end where they overlap.
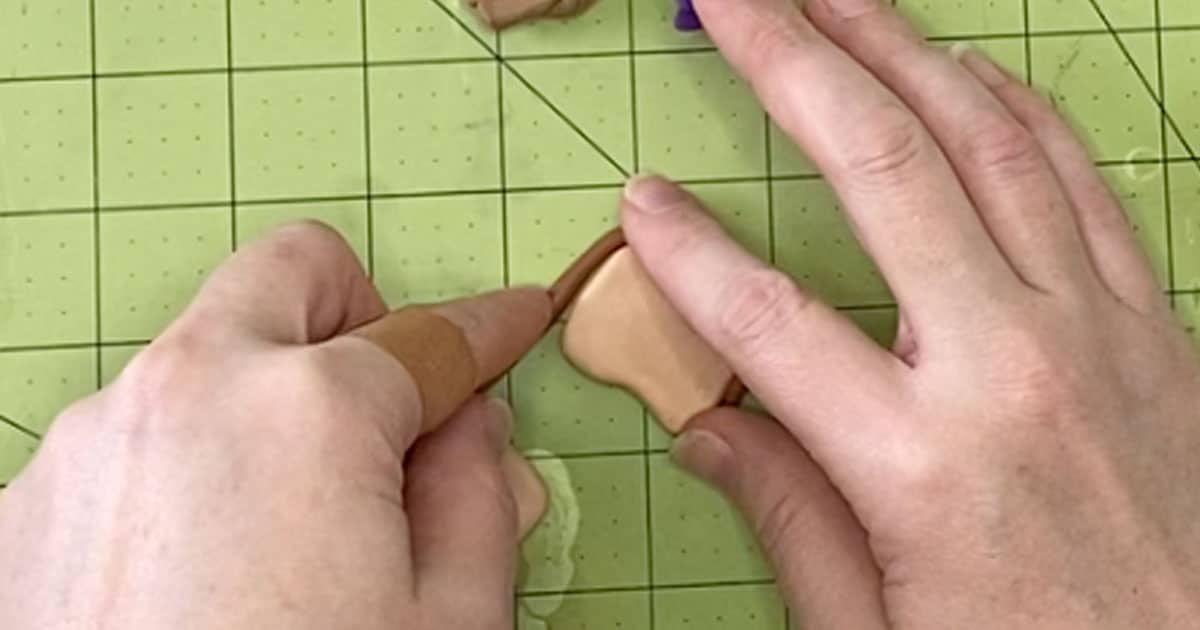
Gently work the light brown clay and the dark brown clay together to join them, making the dark brown clay look like a part of the light brown - just darker.
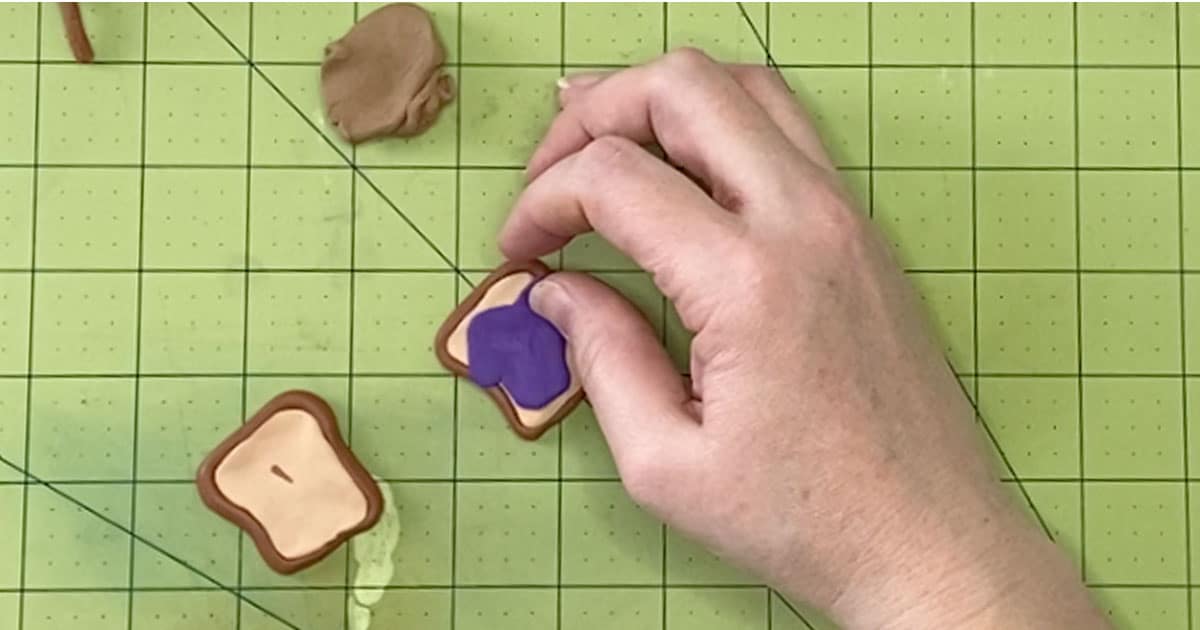
Make the jelly by breaking off a small bit of purple clay (about 1/4-inch square) and mashing it flat in an oblong shape.
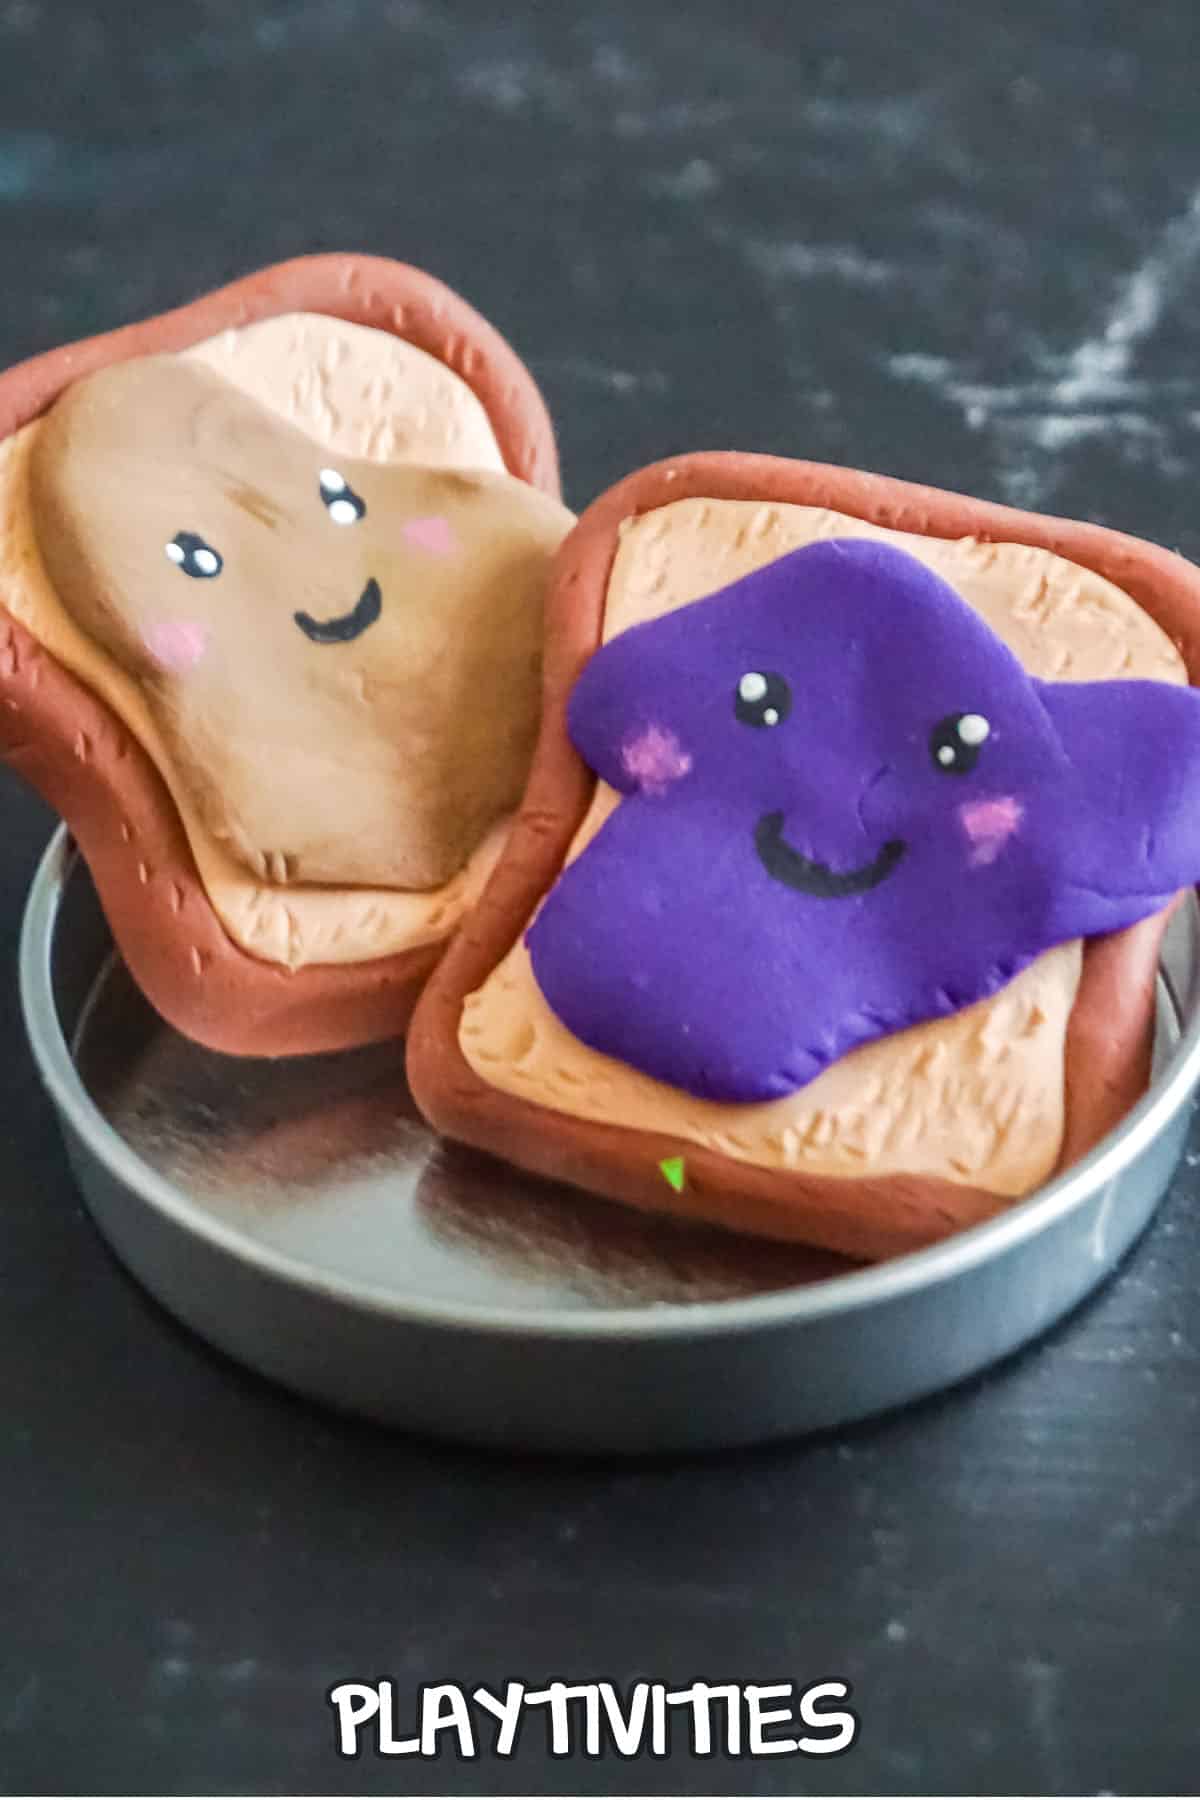
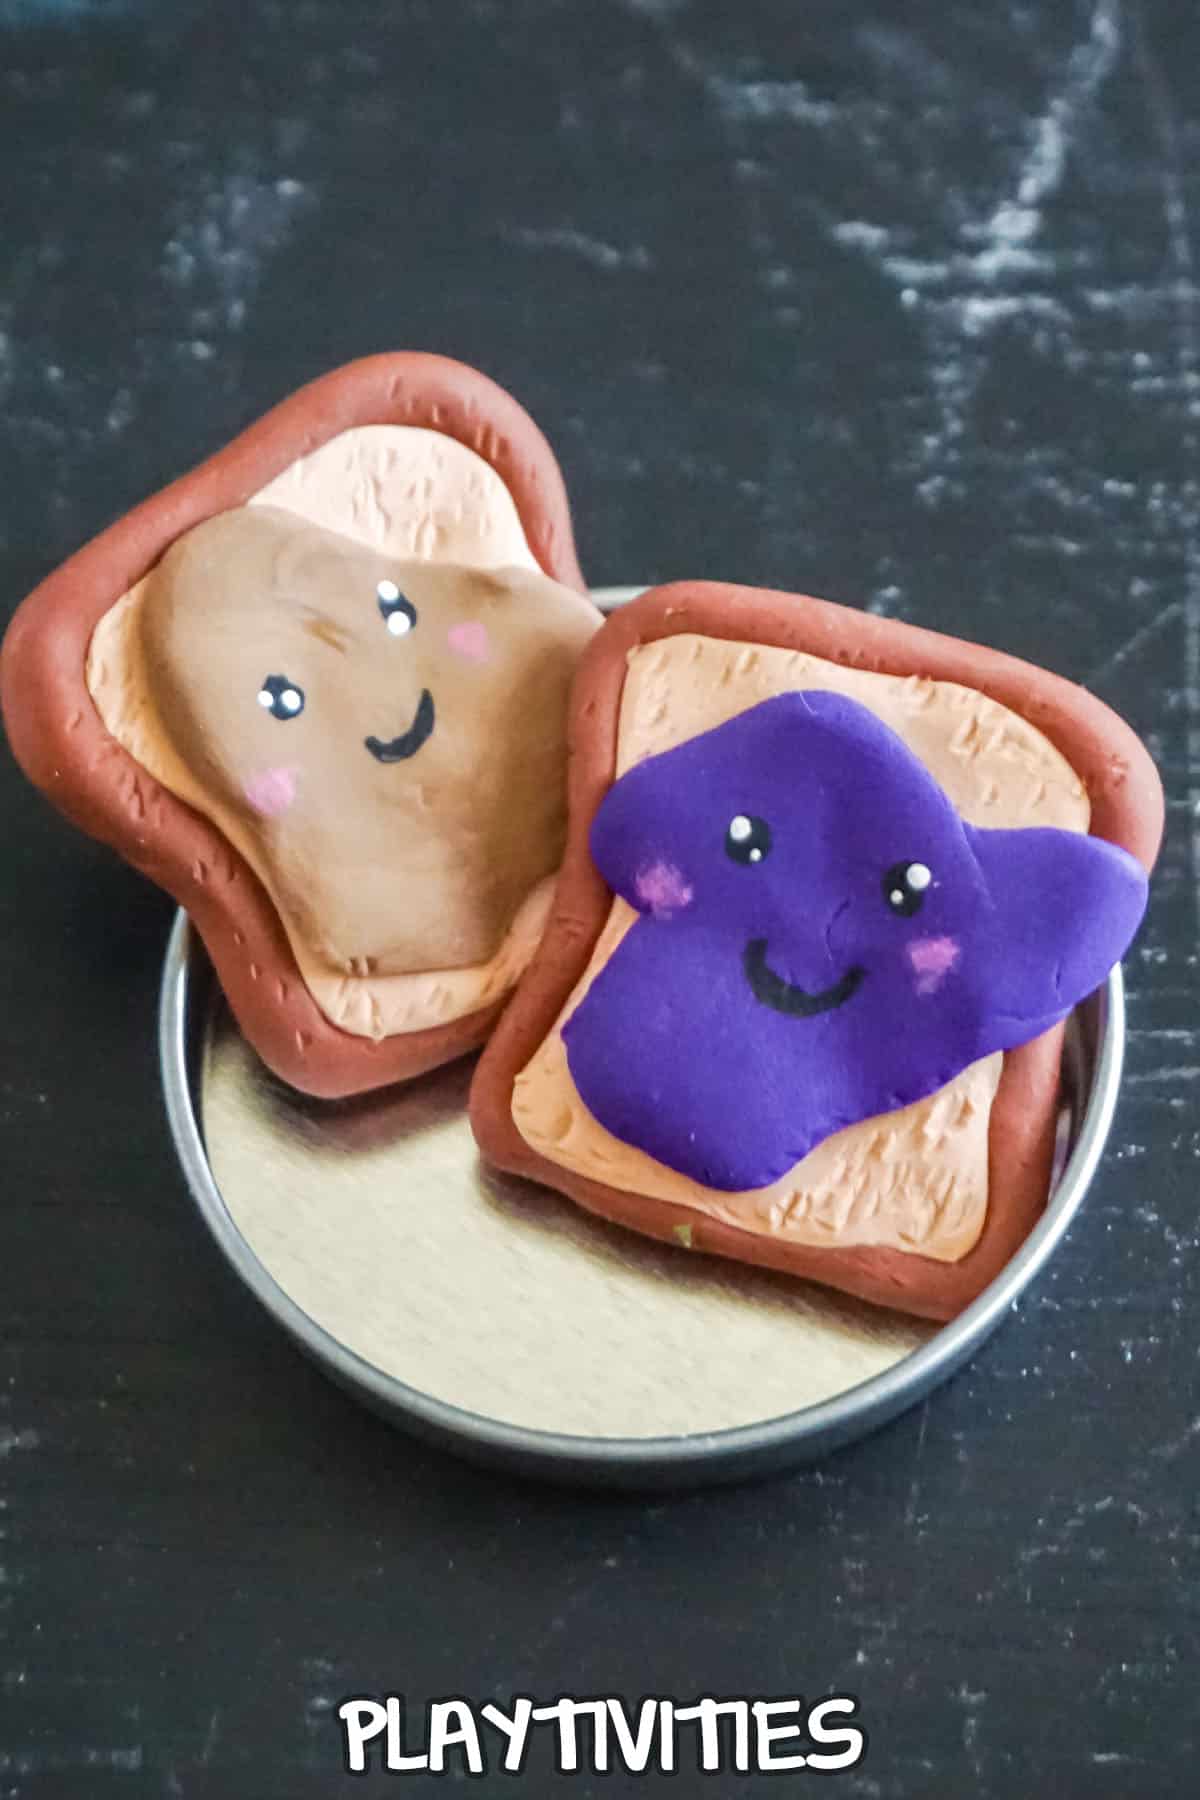
Place the jelly shape on top of one of the toast pieces and press it down firmly. Repeat with the tan clay to make the other toast have peanut butter.
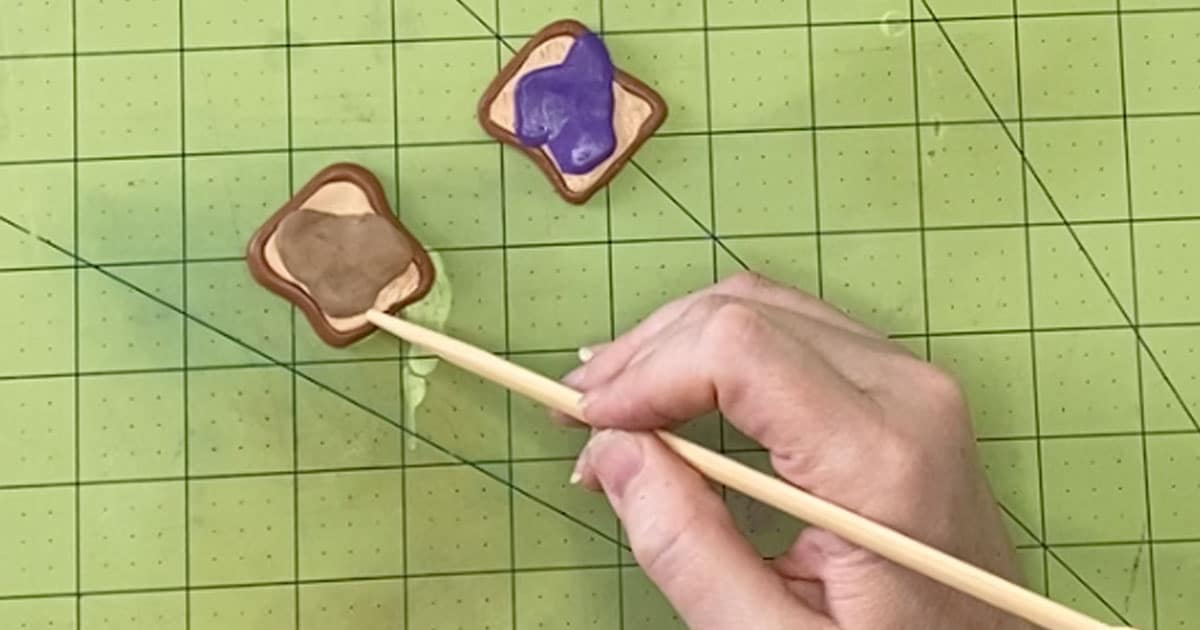
With the tip of a chopstick or toothpick, gently dab the exposed area of the light brown (bread) area to give it a little toast texture.
Clean your fingerprints and tiny imperfections from your toast by gently brushing the clay with a paintbrush dampened in rubbing alcohol. This does not have to be super wet with the alcohol, just a little goes a long way. Take care to brush the beige parts first, followed by the other colors so that no colorful clay smears on your beige clay.
Bake the clay toast per the instructions on your clay packaging. Allow to cool completely before handling.
Using the end of a toothpick, draw on two black dots for eyes and a smile on each toast top.
Using the clean end of the toothpick, place the smallest dot of white paint on the black part of the eyes.
Allow the paint to dry then enjoy!

Isn't this just the funnest little craft?! If you wanted to turn it into a charm, you'll just add an eye hook and chain. I personally just love having the figure on my desk.
If you loved this as much as I do, be sure to pin it to your favorite craft board on pinterest so you can find it again fast when you're ready.
MORE FUN KIDS CRAFTS YOU'LL LOVE
- Weather Science Experiments for Kids
- Epic Fort for a Cozy Family Evening
- 50 Art Supplies from Your Trashcan
PB&J Best Friends Charms from Polymer Clay
Such a fun and easy kids craft, these PB&J best friends charms from polymer clay are a simple and quick way to say "we're BFFs!"
Materials
- Light Brown Polymer Clay
- Dark Brown Polymer Clay
- Tan Polymer Clay
- Purple Polymer Clay
- Rubbing Alcohol
- Pink Acrylic Paint
- Black Acrylic Paint
- White Acrylic Paint
Tools
- Oven
- Parchment Paper
- Baking Sheet
- Toothpick
- Paintbrush
- Butter Knife, optional
Instructions
- Preheat your oven to the temperature noted on your clay packaging. For my clay the baking temperature is 230-degrees F.
- To make the crust of the bread/toast, break off a small portion (about 1/2 inch square) of the dark brown clay.
- Roll this into a long, thin snake. Set aside.
- To make the main part of the toast, break off a small portion (about 1/4 inch square) of the light brown clay.
- Roll this beige clay into a nice, neat ball that is very smooth, then flatten it into a square of about 1/2 inch by 1/2 inch. Pinch the square about 1/3 of the way down from the top (whichever end you'd like to be the top is up to you) and smooth the edges neatly. Repeat with a second piece to make a second piece of bread.
- With the dark brown snake of clay, wrap the dark brown clay around the light brown clay square. Pinch off the end where they overlap.
- Gently work the light brown clay and the dark brown clay together to join them, making the dark brown clay look like a part of the light brown - just darker.
- Make the jelly by breaking off a small bit of purple clay (about 1/4-inch square) and mashing it flat in an oblong shape.
- Place the jelly shape on top of one of the toast pieces and press it down firmly. Repeat with the tan clay to make the other toast have peanut butter.
- With the tip of a chopstick or toothpick, gently dab the exposed area of the light brown (bread) area to give it a little toast texture.
- Clean your fingerprints and tiny imperfections from your toast by gently brushing the clay with a paintbrush dampened in rubbing alcohol. This does not have to be super wet with the alcohol, just a little goes a long way. Take care to brush the beige parts first, followed by the other colors so that no colorful clay smears on your beige clay.
- Bake the clay toast per the instructions on your clay packaging. Allow to cool completely before handling.
- Using the end of a toothpick, draw on two black dots for eyes and a smile on each toast top.
- Using the clean end of the toothpick, place the smallest dot of white paint on the black part of the eyes.
- Allow the paint to dry then enjoy!


Leave a Reply